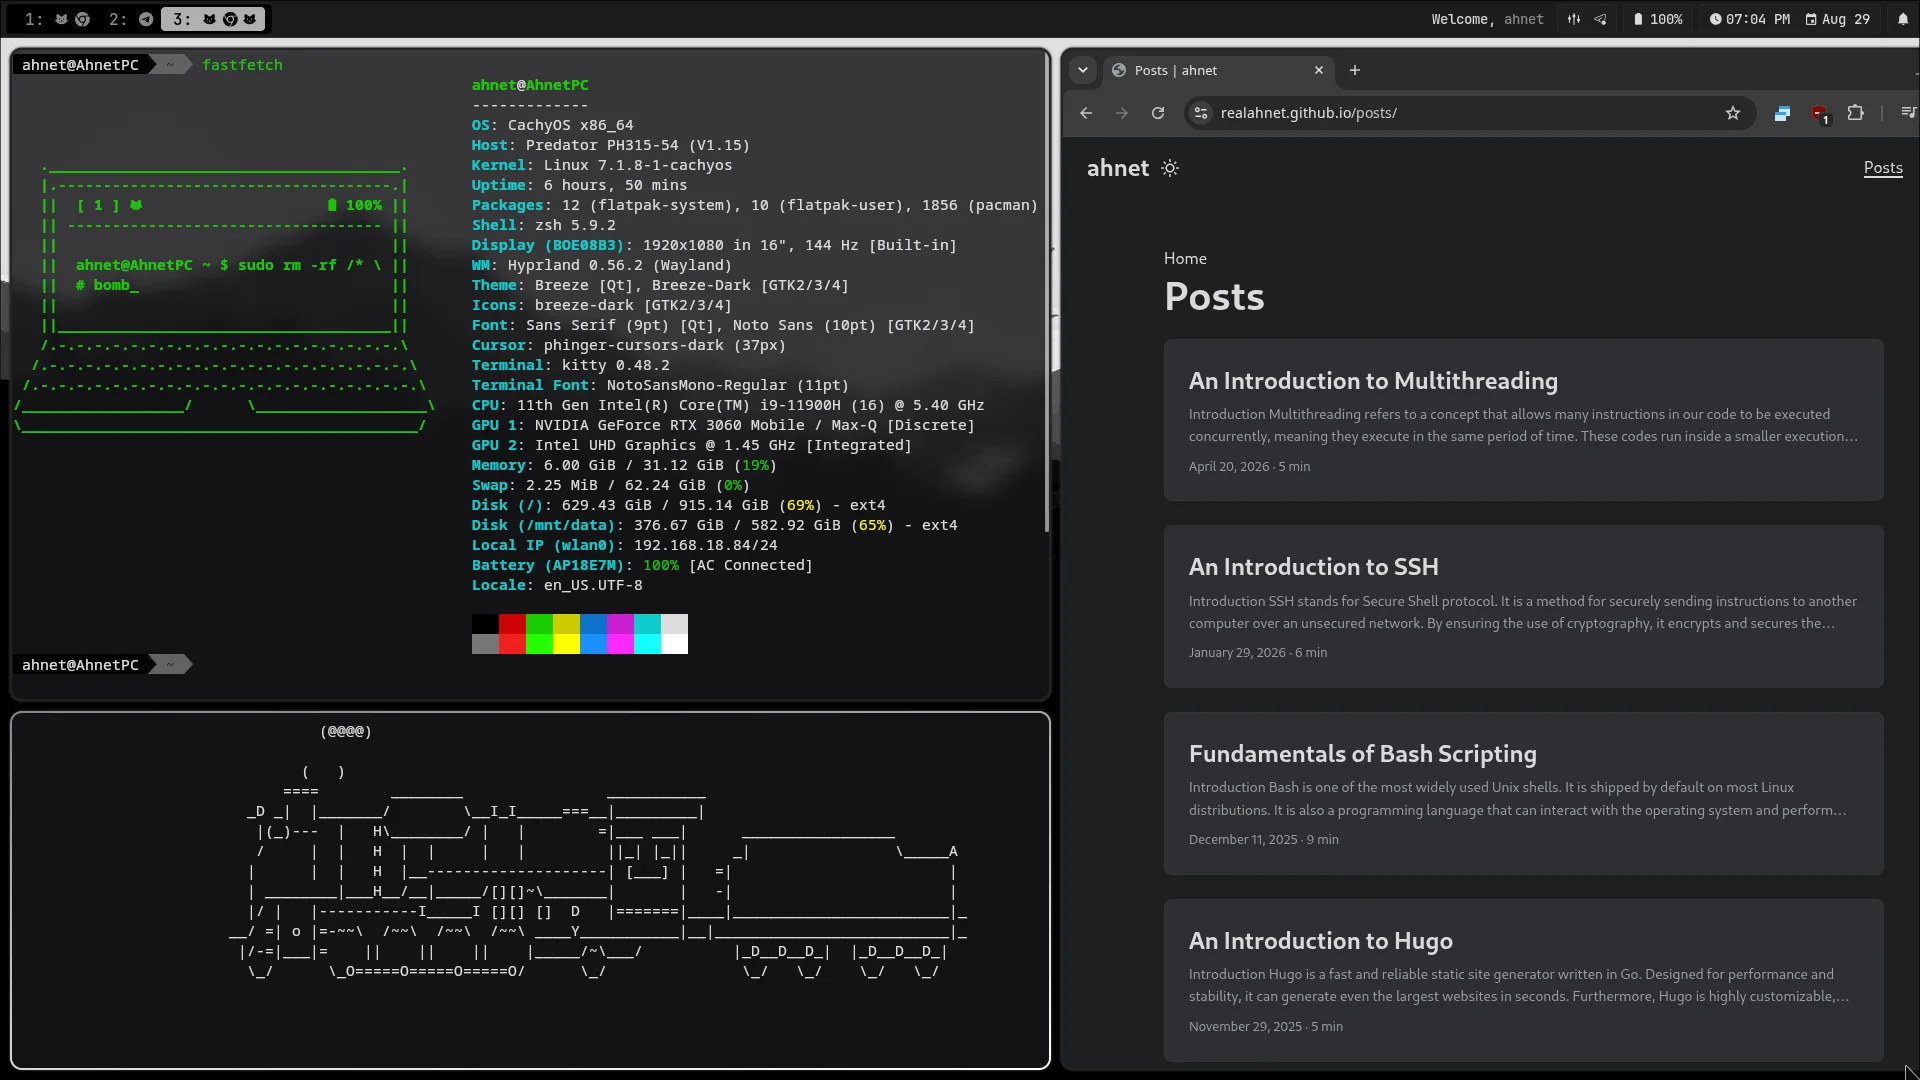
Introduction
When switching to Linux, most users opt for a “desktop environment.” I myself remember trying out various desktop environments such as Gnome, KDE Plasma, XFCE, and Cinnamon. However, I always wanted something that responded instantly to my commands. I felt that moving my mouse to an application’s icon was too much of a hurdle. That is when I discovered window managers, and I’ll be talking about them in this blog later on.
However, I was pretty scared of them. Hearing about having to configure them from scratch… and setting up keybinds was overwhelming. Yet, I finally decided to break that thought of fear and jumped straight into the fire. I began ricing my configuration from scratch, and the way I use my desktop has completely been revamped.
What is Wayland and How is it better than X11?
Before we jump in to playing with Hyprland, we must understand what Wayland is and its history.
Initially most Linux desktops relied on the X11 protocol. The X Window System was first released on September 15, 1987, and it received its final major release on June 6, 2012. However, as the tech modernized, X11 began to show its age in various issues that we will be covering in this blog.
Hence, Wayland was introduced: A newer display protocol that aims to replace X11 to not only provide better performance but also fill the gaps that X11 left open.
Wayland has been built with modern demands in mind, and it addresses the following major issues:
1. Native Vsync support
Vertical sync is a feature designed to combat screen tearing. This issue occurs when the GPU of the device is outputting more frames than the monitor can show at a time. As a consequence, the display is forced to render a new frame while it is in the middle of showing the current frame, causing screen tearing.
The most common cause for this issue is when the GPU is rendering at a higher FPS than the refresh rate of the monitor. By not only capping the frame rate to the monitor’s refresh rate but also by waiting until the current frame has rendered successfully and then sending a new frame, it ensures that no screen tearing occurs. Wayland implements this feature and ensures no visual artifacts occur.
2. Poor Multiple Monitor Configuration
In today’s day and age it is not uncommon to have a multiple-monitor setup. It is important that each monitor be configured separately with its respective settings for maximum productivity. However, X11 was designed around a single shared screen; hence, mixing displays with different refresh rates or DPI has been unreliable. For example, if a setup includes a 60 Hz monitor and a 144 Hz monitor, one of the monitors will show tearing because of the refresh rate mismatch. Furthermore, poor DPI scaling may cause some UI elements to be blurred.
In contrast, Wayland was designed with multi-monitor setups in mind and ensures that each output is configured separately. Hence, this approach ensures each monitor has its respective refresh rate and DPI, minimizing unreliability across different monitors.
3. Security Isolation
Unlike X11, where any background app has global access to your system and can take screenshots of any other window without your permission, Wayland enforces security isolation.
This means that each app runs in its own sandboxed space and is only allowed to take inputs when it is in focus. This prohibits from any app from accessing your sensitive information. Any access needed for such actions will prompt up a popup explicitly asking you to allow the access.
What is Hyprland?
Most Linux distributions out of the box use a desktop environment that runs on top of their display protocol (X11 or Wayland). This desktop environment provides a complete GUI that allows you to interact with it via a mouse and keyboard. It may include allowing you to drag windows, resizing them via mouse, or smaller widgets that may handle your network connectors / Bluetooth connections.
However, Hyprland is a tiling window manager. A tiling window manager automatically arranges windows into non-overlapping tiles across screens and can be explicitly controlled via configurable keybinds.
This means that it does not come with most GUI elements out of the box, and it has to be configured accordingly. Unlike a desktop environment, such as KDE Plasma and GNOME, Hyprland is the compositor itself, and it explicitly handles window placement and animations on its own.
This means UI elements such as bars are handled via external lightweight packages. One such example is Waybar, and I’ll be showcasing it later on.
Why Switch to Hyprland?
As one of my lecturers once said, “A practiced person using a keyboard to achieve one task will always be faster at doing it than a person using a GUI with a mouse.”
This saying directly goes along with a tiling manager, as you can configure various keybinds to perform various actions at a glance.
Following are the advantages to using a tiling window manager:
1. Blazing Fast Operations
One of the things I’ve really enjoyed after switching to Hyprland is that I can configure any keybind to perform various actions as needed.
The most repetitive keybinds I use are
SUPER+B=> To launch my browserSUPER+T=> To launch my terminalSUPER+SPACE=> To launch my application launcher
These are just some of the keybinds I’ve configured. This way I do not have to drag my cursor across the screen just to press an icon or to launch any app.
Another good use of these keybinds is to instantly configure your Windows tile and snap. In the below media, I’ve demonstrated how quickly I am able to move my windows and resize them with SUPER + Right Mouse Button
2. Little Resource Overhead
Most desktop environments come pre-installed with various software and their respective background services that unnecessarily hog system resources. However, Hyprland itself is a window tiling manager only. It does not come installed with anything. Things such as the taskbar have to be configured by the user themselves. One example is Waybar, which I use as my taskbar.
This ensures that only the services you need are run, hence reducing unnecessary overhead.
3. Infinite Customization
Hyprland does not come with any services and UI elements preconfigured. Hence, you can set up ultra-lightweight components to use as replacements. For example, instead of having a predefined taskbar style, you can use Waybar as your taskbar and easily configure it with its configuration files to get it to look exactly as you want.
You can configure how Windows look and what theme is applied to them and configure app launchers such as Rofi or system volume dialogues such as swayOSD to match your desired theme.
How Hyprland Drastically Changed the Way I Use my Computer
Hyprland has completely changed the way I interact with my computer. One of the most important advantages I gained is that I focus strictly on what I need to do. For example, I would often start opening messaging apps even though I would not need to use them. On Hyprland, this does not happen due to its minimalist nature.
Another thing it has done for me is reduced my hand movement via mouse. My hands stay on the keyboard most of the time unless the application I’m using explicitly requires mouse input. Even then I’ve been recently practising to get my hands on various shortcuts for various applications.
Yet, the instant launch speed of apps and the smooth animations provided by Hyprland just look so visually appealing. It does not make me think that my system is slow even when I’m restricted to 60 Hz on battery. Having keybinds to the apps I use the most also contributes to the speed factor. For example, I can launch Chrome instantly whenever I need it.
How to Setup Hyprland?
Hyprland is available on most Linux distributions. Installing it is super easy as follows:
Arch-based Distributions:
sudo pacman -Syu hyprland kitty
Fedora (39+) based Distributions:
sudo dnf install hyprland kitty
Debian-based Distributions:
Hyprland is not packaged in official Debian or Ubuntu repositories due to strict release schedules and rapid Wayland updates. Readers on Ubuntu/Debian should use official building instructions from the Hyprland Wiki or build via a container/third-party PPA.
Note: Kitty is a terminal emulator here. It is needed by Hyprland, and it is where you’ll be using your terminal commands.
Once the installation is done, logout of your current session or reboot your computer. In your display manager, choose Hyprland before logging in. (Usually near the password field or in one of the corners of the screen.).
Configuring Hyprland
Once you log in to Hyprland, you’ll be seeing a screen with the default Hyprland wallpaper.
You will also notice the following warning:
“Warning: You’re using an autogenerated config! Edit the config file to get rid of this message…”
I’ll be giving an overview of how to customize Hyprland. However, if you want to go deeper, you can check out this video here. I used the same tutorial to rice my config from scratch.
NOTE: This guide is for Hyprland versions 0.55+ using lua
Earlier versions used hyprland.conf
Step 1. Removing the auto-generated config
- The first step is to remove the auto-generated warning. You can do this by first launching the terminal by pressing
SUPER+Q.
Note: By default,
SUPERis the Windows key on your keyboard.
- Then open any file editor of your choice (e.g., nano, vim) and open the file:
~/.config/hypr/hyprland.lua - Find the line where:
autogenerated = true
- Remove this line or set it to
false
If this block does not exist in the config, then you can skip this step.
Step 2: Changing the wallpaper
Unlike a desktop environment, Hyprland does not have you set a wallpaper from anywhere, and we need to install a component to handle it for us. Hence, we are going to be using awww-daemon.
- First install awww by:
Arch-based Distributions:
yay -S awww-git # Or build manually via AUR
Other Distributions:
awww is not packaged for most distributions so it is possible to install it via cargo:
cargo install awww # needs Rust/Cargo installed
Check the official documentation for full commands.
- Once installed, you can set a wallpaper as follows:
awww img path-to-img
Replace path-to-img with your image’s path
Note: Move the image to a directory where it will not be deleted. awww does not cache your wallpaper and will fail to display it if you delete the image or move it from its path.
Add awww-daemon to your hyprland autostart list:
- Edit
~/.config/hypr/hyprland.luaand under the auto-start heading add the following block:
hl.exec_cmd("awww-daemon")Your start function may look something like this:
------------------- ---- AUTOSTART ---- ------------------- hl.on("hyprland.start", function () hl.exec_cmd("awww-daemon") end)- Edit
Additional Step: Disable the Forcing of Default Mascot Wallpaper
Hyprland forces its anime mascot wallpaper by default if awww does not run. Hence, disable it via the following change:
- Find this following block in
~/.config/hypr/hyprland.lua:
hl.config({
    misc = {
        force_default_wallpaper = 1,
        disable_hyprland_logo   = false,
    },
})
- Set
force_default_wallpaperto0anddisable_hyprland_logototrue.
Step 3: Configuring Keybinds
Have a look at this code block in ~/.config/hypr/hyprland.lua:
---------------------
---- KEYBINDINGS ----
---------------------

local mainMod = "ALT" -- Sets "ALT" key as main modifier <= SUPER KEY
local secondMod = mainMod.. " + SHIFT"

-- Apps
hl.bind(mainMod .. " + T", hl.dsp.exec_cmd(terminal))
hl.bind(mainMod .. " + F", hl.dsp.exec_cmd(fileManager))
hl.bind(mainMod .. " + B", hl.dsp.exec_cmd(browser))

-- Screen Lock
hl.bind(mainMod .. " + M", hl.dsp.exec_cmd("hyprlock"))

-- Screenshot
hl.bind(secondMod .. " + S", hl.dsp.exec_cmd("hyprshot -m region -o ~/Pictures/Screenshots"))

-- Launcher
hl.bind(mainMod .. " + Space", hl.dsp.exec_cmd(launcher))
hl.bind(mainMod .. " + period", hl.dsp.exec_cmd(emojiLauncher))
hl.bind(secondMod .. " + Space", hl.dsp.exec_cmd(runner))

-- Windows Cycling
hl.bind(mainMod.. " + TAB", hl.dsp.window.cycle_next())
hl.bind(mainMod.. " + SHIFT + TAB", hl.dsp.window.cycle_next({ next = false }))
Note: You may not have
secondMod, but you can configure it same as mine. Here mainMod is what I was referring to asSUPER.
Note: In my config, I set
mainMod = "ALT". If you want to use the default Windows key instead, setlocal mainMod = "SUPER"
You can see that the SUPER key is concatenated by the following keybind inside the hl.bind function. Then appropriate actions for each keybind are executed. The above snippet is from my own config, and hence why you can see hyprlock and hyprshot being configured.
Launching an Application:
You can use hl.dsp.exec_cmd() as the second argument to the bind function to execute a command or run an application.
Modifying existing Keybinds:
- If you do not like the default keybinds, for example, Alt + Q does not seem appropriate to launch our terminal. Hence, we can configure it to launch with
SUPER + T:
hl.bind(mainMod .. " + T", hl.dsp.exec_cmd(terminal))
- You can modify the keybinds for moving windows around:
hl.bind(mainMod .. " + H",  hl.dsp.focus({ direction = "left" }))
hl.bind(mainMod .. " + L", hl.dsp.focus({ direction = "right" }))
hl.bind(mainMod .. " + J", hl.dsp.focus({ direction = "up" }))
hl.bind(mainMod .. " + K",  hl.dsp.focus({ direction = "down" }))

-- Move windows with secondMod + H J K L
hl.bind(secondMod .. " + H",  hl.dsp.window.move({ direction = "left" }))
hl.bind(secondMod .. " + L", hl.dsp.window.move({ direction = "right" }))
hl.bind(secondMod .. " + J", hl.dsp.window.move({ direction = "up" }))
hl.bind(secondMod .. " + K",  hl.dsp.window.move({ direction = "down" }))
I’ve set them above. Press SUPER + H,L,J,K to shift the focus to relevant windows, while using SecondMod or SUPER + SHIFT + H,J,K,L to move them around.
Step 4: Changing the Window Layout
Hyprland comes with many layout styles. Read its wiki for more details.
I’ve configured it to use scrolling layout:
hl.config({
    general = {
        gaps_in  = 5,
        gaps_out = 10,

        border_size = 2,

        col = {
            active_border   = { colors = {"#888888", "#FFFFFF"}, angle = 45 },
            inactive_border = "#1E1E1E",
        },

        resize_on_border = false,

        allow_tearing = false,

        layout = "scrolling", -- <= HERE
    },
    ...
Step 5: Setting up a simple taskbar
We are mostly near to having a completed, minimal, useable setup. The only thing left is to configure a suitable taskbar replacement.
I initially used a project called Hyprpanel. However, it was deprecated and was continued with Wayle. I used Wayle for a while before shifting back to Waybar just for minimalism.
Wayle is an entire shell, and that is why it is better than its predecessor. It also handles your volume dialogues, notifications, etc., and that is why you do not need a separate daemon for it.
However, recently, because of my search for a minimalist setup, I switched to Waybar. It is super light-weight and easy to configure.
You can use any of the tools mentioned above. Check their respective documentation for installation, as they have custom installation steps.
After installation is complete, you can launch it with waybar in the shell.
To make it auto-start, you can add it to your ~/.config/hypr/hyprland.lua auto-start block:
    -------------------
    ---- AUTOSTART ----
    -------------------

    hl.on("hyprland.start", function ()
       hl.exec_cmd("awww-daemon")
       hl.exec_cmd("waybar")
    end)
Furthermore, it is configurable at: ~/.config/waybar. Read this wiki for more information.
What are Dotfiles?
Dotfiles are a collection of configurations to achieve someone’s pre-configured setup on your computer.
Various dotfiles exist, and you can find plenty on Reddit subreddits.
I’ve also shared mine: here. Make sure to check it out!
Make sure to read the README to understand how to install it.
Summary
The main aim of this blog was to get you equipped with the fundamentals for Hyprland and encourage you to try it out. It has truly shocked me the way I’ve adapted to use its workspaces and keybinds. My computer flies at every task that I use it for.
As I’ve mentioned, this setup is highly customizable. Whatever I covered in this blog was only the tip of the iceberg. Go wild with your own rices!